Embedding documents in an Excel workbook is a technique that is not widely used, mostly because not many people know you can embed a document in a worksheet. There are three different ways to embed and/or link documents in Excel, but we are going to embed a document directly in Excel, with no links.
First, what are some of the reasons I would want to embed a document in an Excel workbook? There could be any number of reasons, but the one we hear most is that it is easier to see what is being tracked with only one document open, as opposed to two or more. It keeps everything in one place!
We are going to embed the holiday party flier on the same worksheet on which the attendees of the party are listed. This particular workbook is being used to track attendees for all company events, so keeping an embedded copy of the flier on the worksheet keeps the user from accidentally placing names on the wrong list.
Follow the steps below to embed a document into a worksheet in Excel:
- Go to the worksheet in which you want to embed the document, and click the cell that would closest represent the upper-left corner of the document. For us, this will be cell G3.

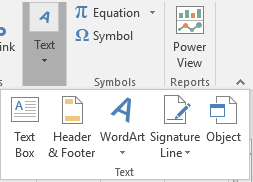
- Click the Insert tab of the ribbon, and then the Text group drop-down menu. In some cases, the Text group will be fully visible with no drop-down menu.

- Click Object and a dialog box will appear. This will allow you to find the file you want to insert.

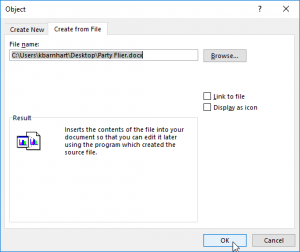
- Choose the Create from file tab, and click the Browse button.

- Navigate to find and select the document you wish to embed into the worksheet, then click Insert.

- Once the original dialog box returns, click OK.

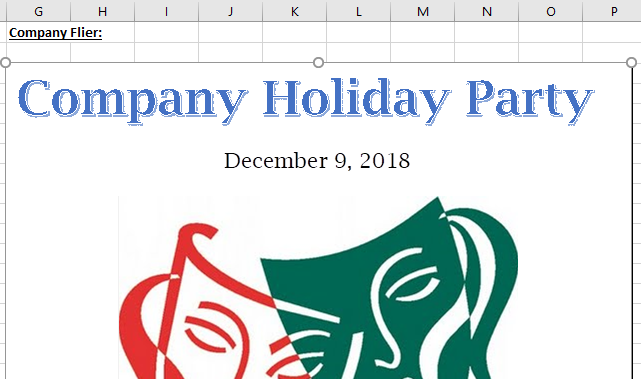
- Your document will appear in the worksheet as a fully functioning document, which in this case is a Word document.


